Introduction
In the world of home labs, Home Assistant has become one of the most powerful and popular tools for automating and controlling home: open-source, highly customisable and with a large active community, it allows one to integrate devices of all kinds, from Zigbee sensors to smart lights, up to more advanced systems such as video intercoms or alarm systems.
One of the most delicate aspects, however, concerns remote access: how to access Home Assistant from outside the home securely, without opening ports on the router and without exposing your server to unnecessary risks? Cloudflare Zero Trust Access, a free service (paid plans also available) that allows you to expose your Home Assistant on the Internet without having to touch your firewall or NAT configuration, and above all with a much higher level of security than simple port forwarding. Using the Cloudflare Tunnel, you can create an encrypted channel between your local server and the Cloudflare infrastructure, completely hiding your public IP and filtering access via two-factor authentication, OAuth providers (such as Google, GitHub, Microsoft) or identity-based rules.
Prerequisites
- Own a domain name;
- Domain DNS on Cloudflare;
- Docker and Portainer.
Create Cloudflare Tunnel
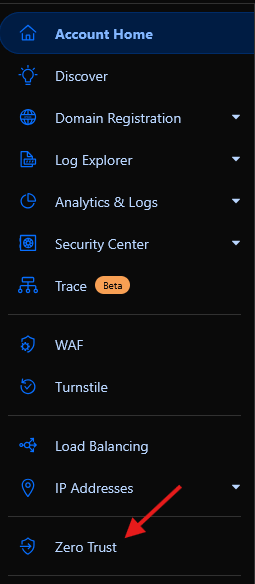
1. Login to Cloudflare and click Zero Trust.
2. In this page, select Tunnels inside Networks section.

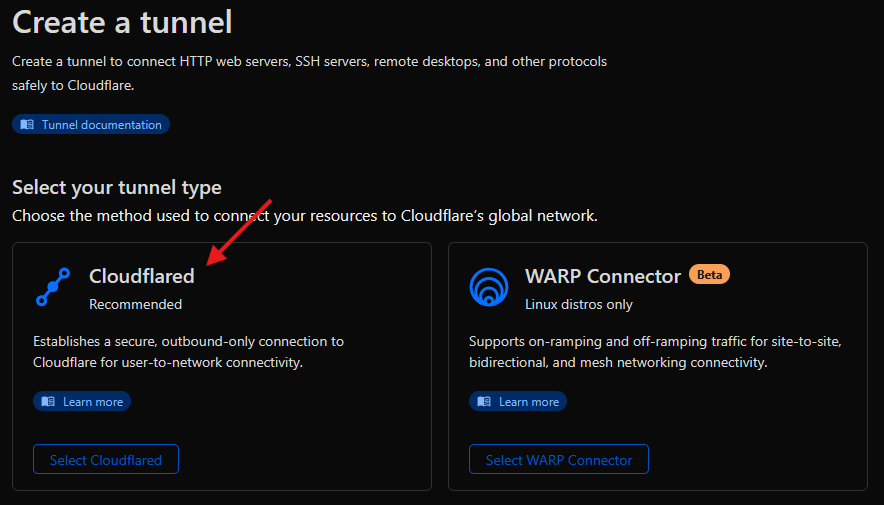
3. Now, Create a tunnel and select Cloudflared tunnel type.
4. Enter a name for the tunnel and click Save tunnel.
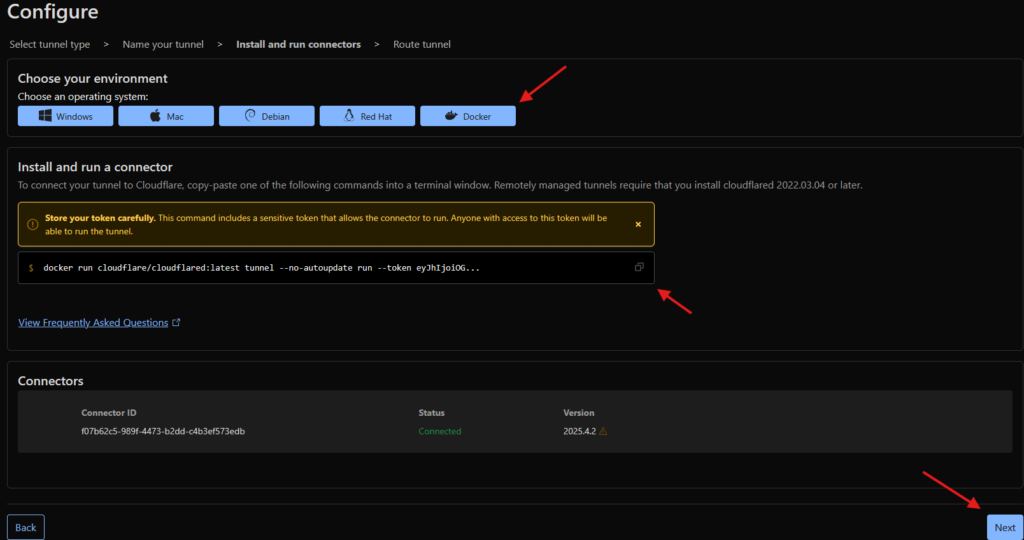
5. In this section, choose Docker then copy and paste the command on the terminal that run your Docker. When the connector is online, click Next.
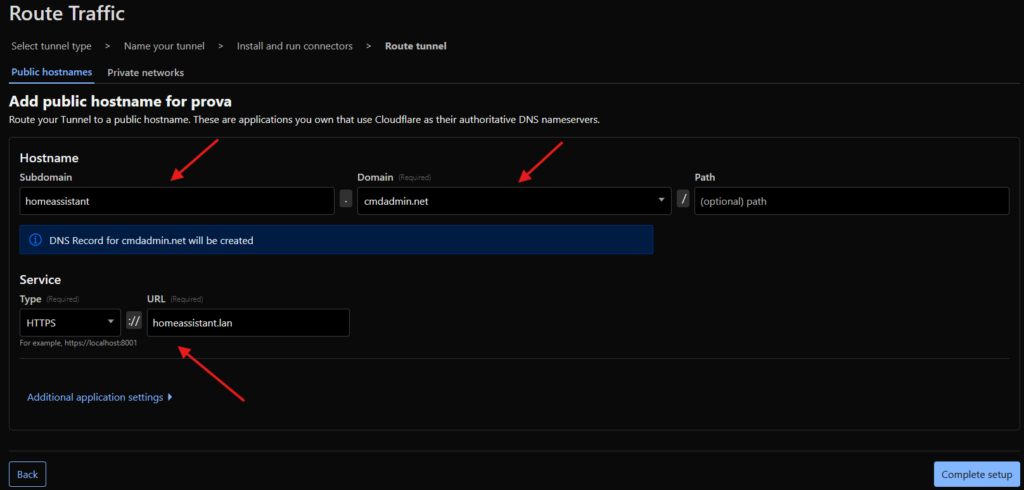
6. Choose a public subdomain to use for DNS and public connections. In Service type the private IP or URL for the home assistant instance, then click Complete setup.
Secure Cloudflare Tunnel with Access
1. Login to Cloudflare and click Zero Trust
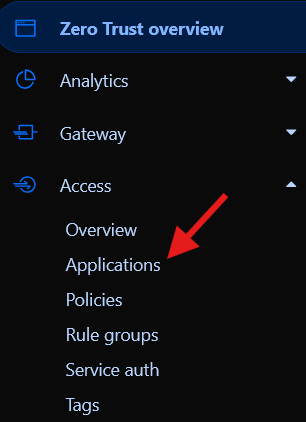
2. In this page, select Applications inside Access section
3. Click on Add a new application and select Self-hosted

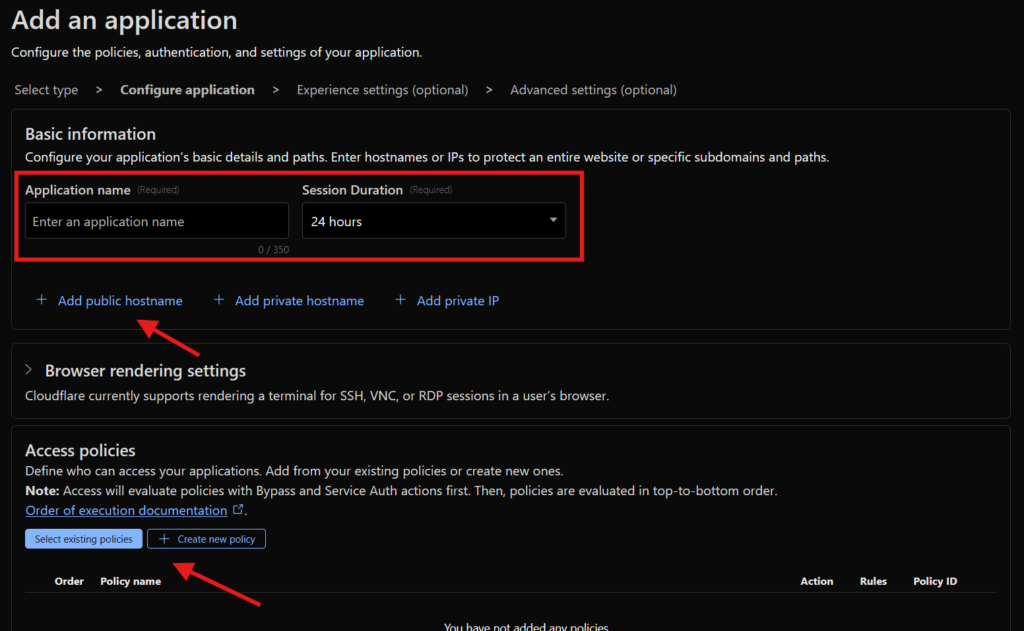
4. Create an Application name and the Session duration, next Add public hostname and insert subdomain and domain created before for the Tunnel. In Access policies section selection an existing policies or create a new one.
5. Go to the last page and click Save.